My Inky Dashboard
I saw a tweet from Andrew Godwin on New Year’s Day that included a picture of his eInk weather board display. I knew he had a three-colour one in the past, but I didn’t realise you could now get multi-colour ones. Some time ago, I had also been gifted a bare Raspberry Pi 3 that I had never got around to doing anything with.
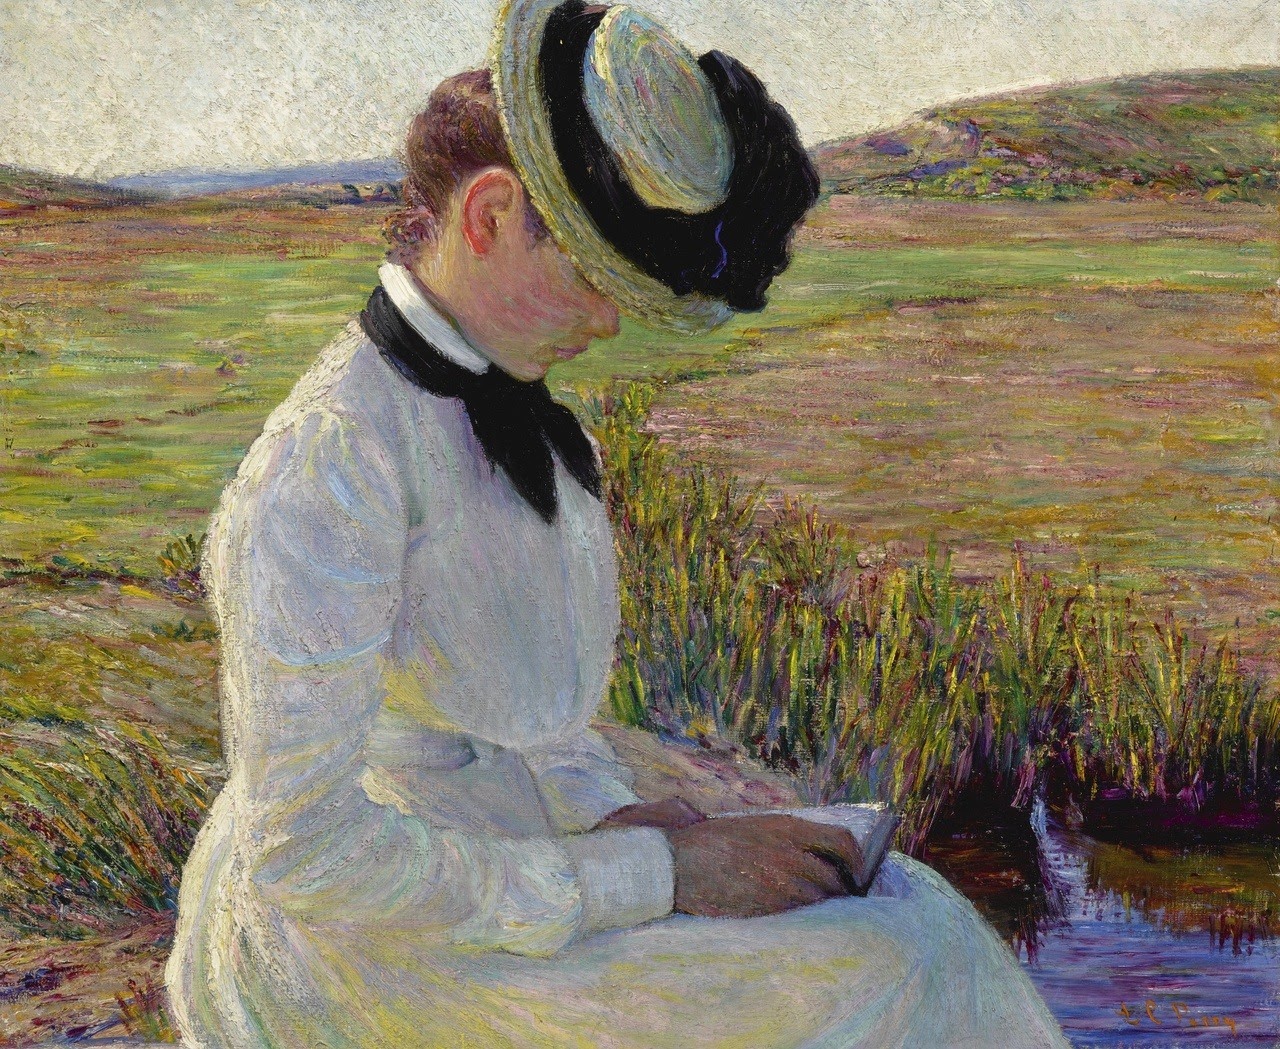
One order from The Pi Hut later, I had a power cable, an HDMI cable, an SD card and a Pimoroni Inky Impression 5.7" 7-colour eInk HAT. An eInk screen doesn’t use any power to maintain its picture, at the cost of taking some time to refresh the picture (15 seconds in the case of this screen). The screen came with Girl Reading a Book by Lilla Cabot Perry pre-loaded, which was nice.
Setting up the Raspberry Pi was straightforward, though the NOOBS operating system installer gives a choice between Full, Normal, and Lite Raspberry Pi OS with no real explanation as to what the difference was. And it appears to be very hard to find out what the difference actually is – in the end I tracked down the stage package files in the image generation repository and decided upon Lite for now. [Aside: RISC OS is also in the list! Aww, memories.]
The Inky Impression connects to the Pi’s GPIO port, and comes with a small GPIO extender and stand offs that meant I could easily screw the Pi to the screen. Then, once I had SSH set up and could connect from my laptop, I then looked at getting the software to talk to the screen.
Pimoroni provide a bash script to run to install everything, but I never pipe scripts to bash, what do you take me for (I saw a GitHub issue somewhere that says they’re moving away from this as well), so I had a look at what the script did. It boiled down to only a few things:
# Enable SPI and I2C on the Raspberry Pi
sudo raspi-config nonint do_spi 0
sudo raspi-config nonint do_i2c 0
# Install some system packages
apt install python3-pip python3-rip.gpio python3-spidev python3-smbus python3-numpy python3-pil
# Install the inky python package from PyPI
pip install --user inky
# Clone the Inky repo with all the example scripts in it
git clone https://github.com/pimoroni/inky -b v1.3.1
I then had a fun time running the examples and seeing things display on the screen, from photographs to stripes. It’s alive!
But I also liked Andrew’s weather display. Kindly he had put the code he had written on GitHub so I took a copy, installed the necessary pieces, and changed it to be in my location. It all worked smoothly – although it was at this point I was also restarting nginx on traintimes.org.uk and made the mistake of shutting down that entire server, rather than my Raspberry Pi…
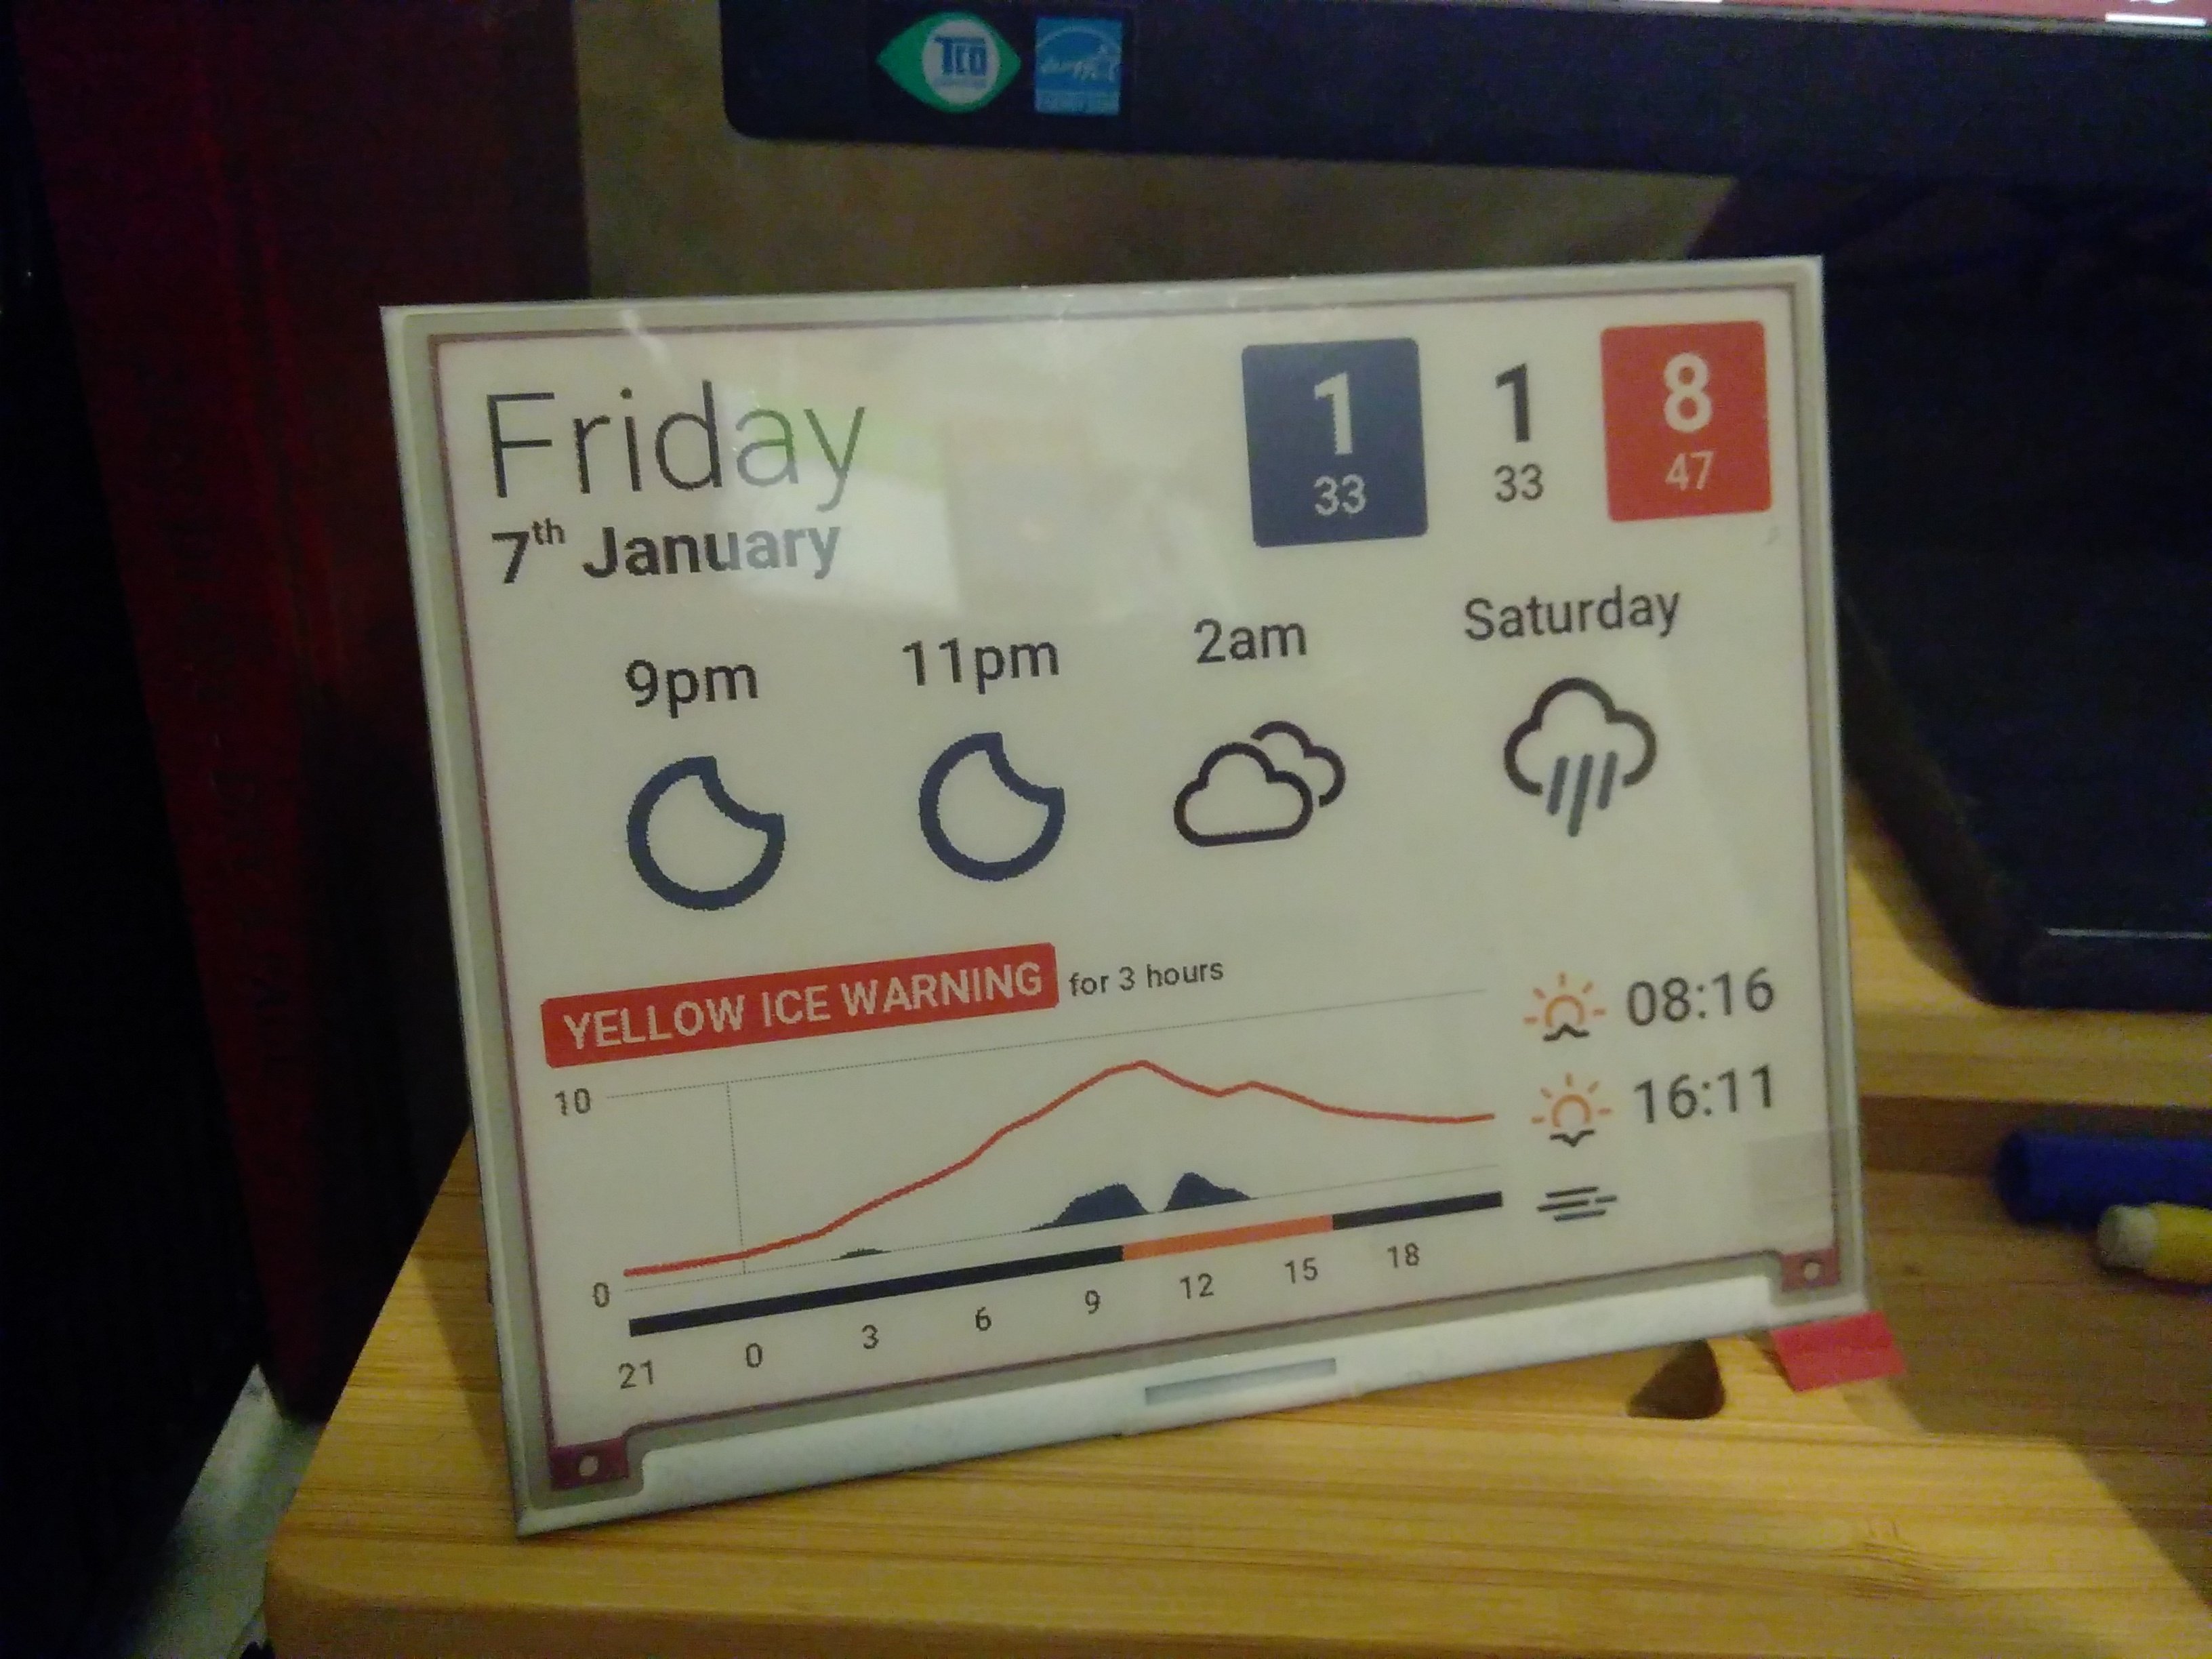
Having got it all up and running, I wanted to start to make some customisations. If not now, I will probably never get round to it! So I wrote some code to use UK holidays, a different font, and then three actual differences:
- I used the ephem library to work out the current phase of the moon and put that (using the moon phase emojis) instead of the air quality indicator;
- I made the rain/temperature/UV graph skip night times;
- I replaced the temperatures top right with the next three buses and trains from my nearest bus stop and railway station to Birmingham city centre.
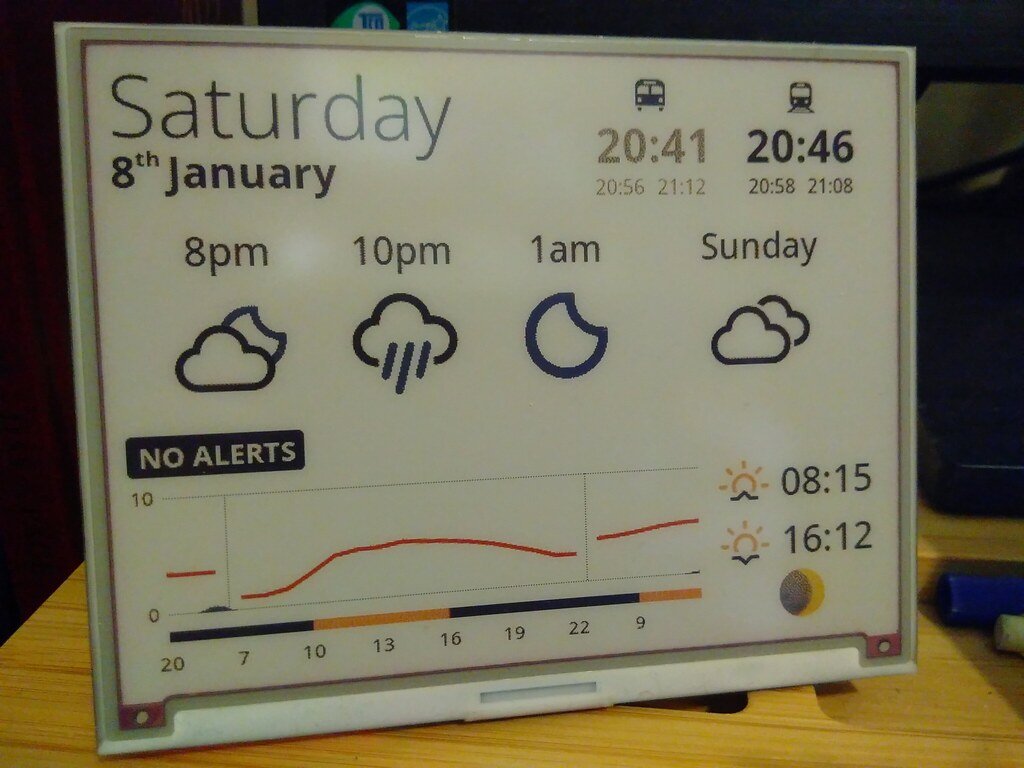
I am undecided how to run the code at present – Andrew has a server that his Pi fetches the generated image from, but I think I might just run it all on the Pi for now. I also haven’t mentioned the buttons – the screen has four physical buttons down the side that you can write code to detect and act on. All I’ve done so far with that is pushing the top button causes a reload/refresh of the screen with the latest information.
The near future will probably be debugging all the edge cases I have missed with my changes, as always, but after that I’m not sure – the main thing I think is missing is to remember what time school pickup is, as that changes daily, so I might try and stick that in somewhere.